
Blog · Tool Guides · 2026-11-08
← Back to blogHow to Make a Professional Headshot With AI (Without a Studio): Background, Light and Sharpness
Can an ordinary indoor selfie become a LinkedIn-ready headshot? I ran 12 selfies through a three-step flow — swap the background, fix the light, add a little sharpness — and documented the base-photo standard, how to choose among four backdrop colors, and the three tells that give AI away.
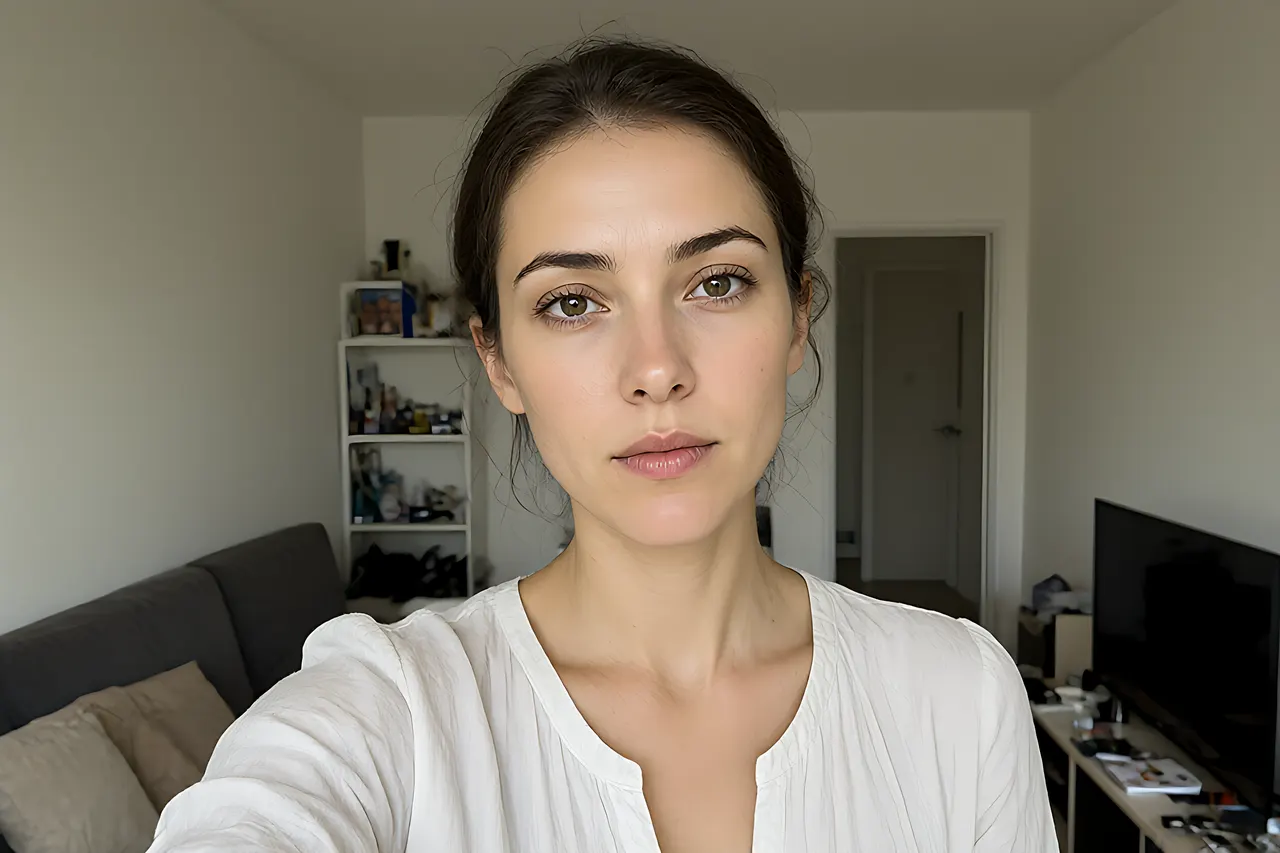
Quick Answer: One Decent Selfie Plus Three Steps Is Enough
If you skip the walkthrough, here it is: start with a front-facing, evenly lit selfie with clear features; replace the background with a solid color using Background Remover; add soft directional light with AI Photo Editor; then finish with a light pass of Image Sharpen. The result holds up on LinkedIn, in a company directory, on a resume, or on a speaker page.
I ran 12 real indoor selfies through the full flow. Ten were usable after one pass; two I marked as reshoot only because the original was a side profile or badly backlit. Tools can change a background and the light, but they cannot change the angle you shot at — that is the premise of this whole thing.
What We Tested: 12 Selfies, Three Steps, Judged by Hiring Standards
This is not a tool comparison but a complete path from casual snapshot to presentable portrait. Every photo got exactly three steps, one output each, with no manual retouching — the amount of effort most people will actually put in.
- Base images: 12 phone portraits taken indoors, 8 front-facing, 3 slight three-quarter, 1 clear side profile
- Fixed order: solid-color background → soft directional light → light sharpening
- Scorecard: fake-looking edges / natural skin tone / clarity of features in a small circular avatar / whether it reads as AI-edited at a glance
Step One: Replace the Background to Remove the Everyday Feel
The biggest visual difference between a headshot and a selfie is not the face, it is the background. Bookshelves, curtains and kitchen counters keep a photo in snapshot territory. A solid color immediately moves it toward a formal portrait.
Watch the hair and shoulder line above all: a white halo or leftover background color becomes glaring once the image is shrunk into a small avatar. Cutout & background replacement covers clean edges in detail, so I will not repeat it here.
- Wear a solid-color top that contrasts with the background; it makes the cutout far easier
- Flyaway hair, glasses and transparent materials are the three hard cases — check at 100% after swapping
- Do not adjust color until the edge is clean; otherwise every later step enlarges that fake outline
Step Two: Fix the Light — This Is What Makes It Look Studio-Shot
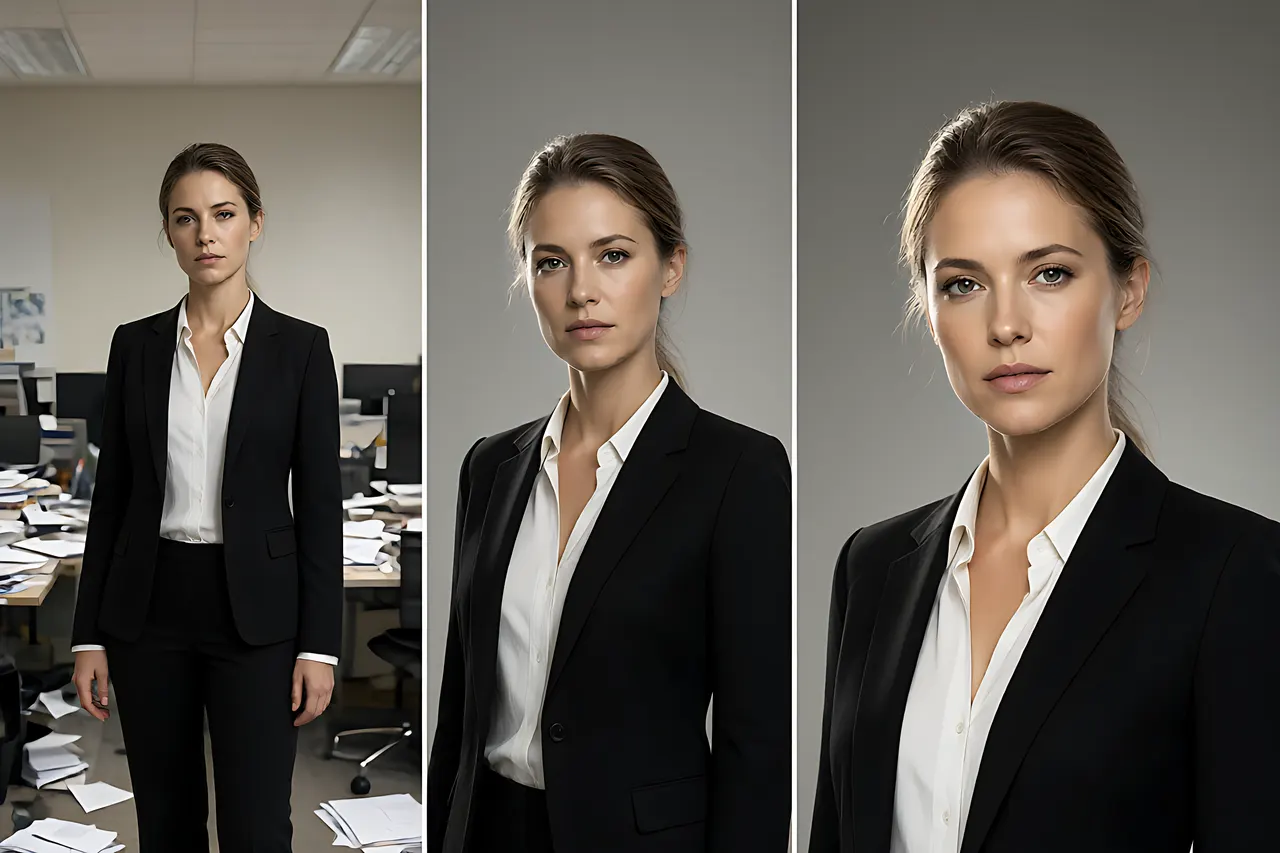
Indoor selfies usually have flat overhead light, heavy shadows under the eyes and no facial volume. Ask the AI for soft window light from the front left at 45 degrees, gentle fill, keep skin texture and the face gains dimension immediately. This step improves the result more than the background swap does.
In the three-panel comparison, the middle image only had its background replaced and the face is still flat; only the right one, with light and mild sharpening, reads as a real corporate portrait. Never write smooth skin, brighten, beauty retouch — that is the fastest route to a plastic face.
- Describe the direction and softness of the light; it works ten times better than make it look nicer
- Keep skin texture, keep pores is the single phrase that prevents the AI look
- Underdo the light rather than overdo it; too much leaves unnatural highlights on the nose and forehead
Step Three: Add Sharpness Lightly, and Only Lightly
A headshot is usually seen as a 200–400 pixel circle. You do not need more detail, you need clean edges. One light sharpening pass to recover eyelashes, a collar and a few hair strands is enough — do not reach for 4x super-resolution.
If the original is out of focus, reshooting beats any amount of post-processing. The principle matches image upscaling: only enlarge what is already right.

How to Choose Among Four Backdrop Colors
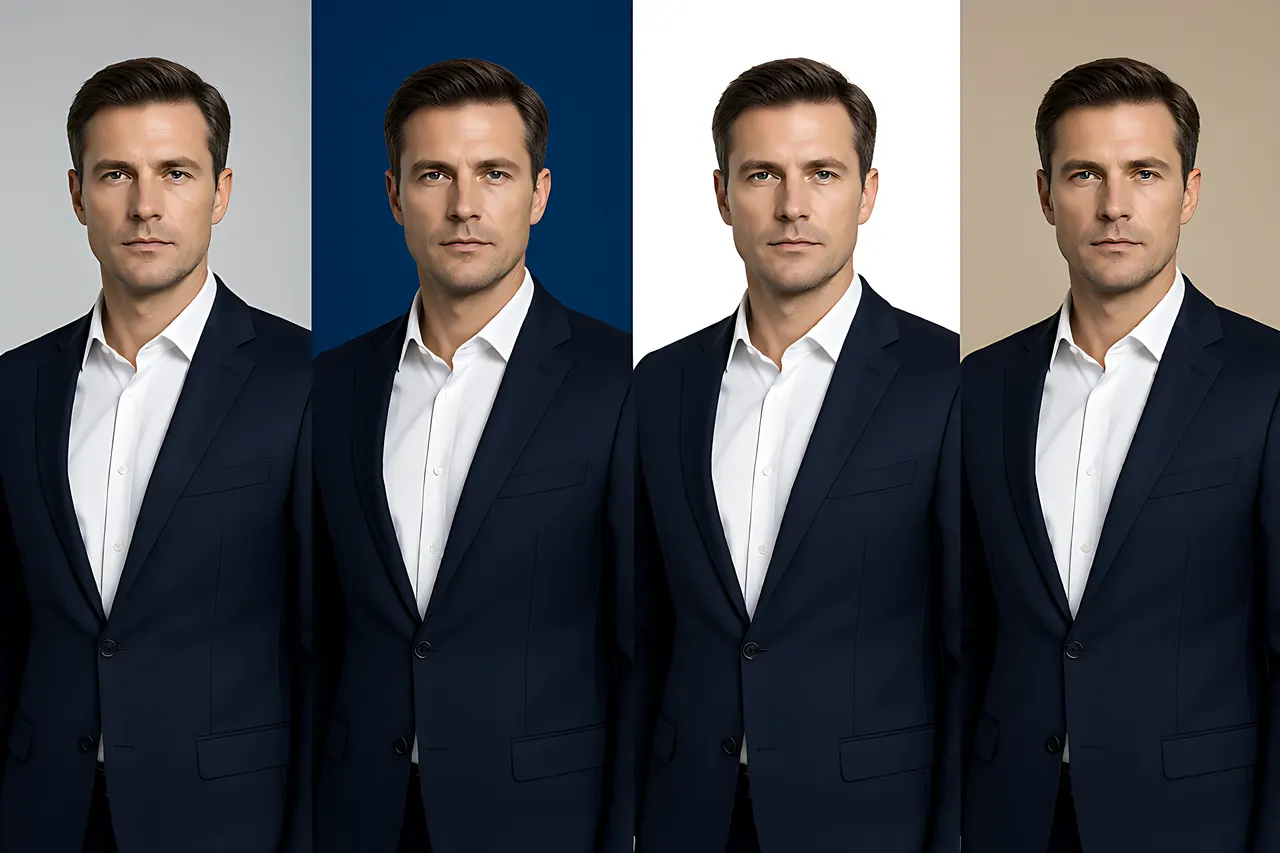
I swapped the same portrait onto four backdrops, and the difference in use case was larger than expected. Do not default to white:
- Light gray: safest, suits law, finance and consulting, and works with any clothing color
- Deep blue: common in tech and on job platforms, professional but slightly distant; pairs well with a dark suit
- Pure white: most universal for resumes, IDs and system uploads, but a pale shirt can blend into it
- Warm beige: friendly for startup teams, personal sites and creator pages; avoid it in formal hiring processes
Scenario Decision Table: Which Kind of Professional Photo Do You Need
The three steps carry different weight depending on the goal:
- LinkedIn or a job application → light gray or deep blue, all three steps, check the shoulder crop
- Company directory or ID badge → pure white is simplest; see ID photo background
- A consistent set for a team page → lock the backdrop color and light direction first, then follow the consistency method in batch-generating images
- Only a side-profile or backlit photo exists → do not force it. Retake one front-facing shot in window light
- Refreshing an old, slightly damaged headshot → remove damage with Free Old Photo Restoration before these three steps
Three Tells That Give It Away
Across the 12 photos, the most obvious giveaways clustered in three places:
- Tell one: over-smoothed skin. The moment skin turns perfectly even, the face reads as a wax figure. Say keep skin texture explicitly when adjusting light.
- Tell two: a backdrop louder than the clothing. Saturated blues and pure blacks pull attention off the face; a headshot is about the person, not the background.
- Tell three: sharpening without fixing the light. Enlarging a flat, soft image just makes it flatter. The order has to be background, then light, then sharpness.
Frequently Asked Questions
Is a headshot made this way acceptable for a formal job application? Yes, as long as it is genuinely you, the features are clear and it is not heavily altered. Official ID photos have strict rules in some countries — follow the official spec for those.
Are all three tools free? Yes. All work online, need no sign-up, and download without watermarks.
Are my photos stored? Photos are used only for the current generation; history stays local in your browser and is never archived on a server.
Can I do this with someone else's photo? No. Processing another person's likeness without consent carries legal and ethical risk — ask first.
Why is there a white halo around the hair? The original was probably backlit, with flyaway hair too close in color to the background. Retake a front-facing shot against a clean background instead of tweaking cutout settings.
Related tools
Free, no sign-up tools that put the ideas in this article to work.
Related posts
How to Remove Image Background: Complete AI Matting Guide (No Photoshop Needed)
I tested a round of difficult images to evaluate matting: long-haired pets, wedding dress fabric, transparent glass cups, white shirts against white walls. Which ones passed, which barely passed, which failed—I give conclusions and remediation methods for each.
Cutout & Background Replacement: Complete Tutorial for Clean Edges and Matching Lighting
The biggest worries when replacing backgrounds are rough edges and mismatched lighting. I break background replacement into three steps, each with specific checkpoints.
Old Photo Repair: Should You Restore, Colorize, or Upscale First? A 20-Photo Test
The same damaged old photo can look completely different depending on the order you process it. I ran 20 real family photos through all six possible orders of repair, colorizing and upscaling to find the right workflow, explain why the wrong order amplifies scratches, and compare scanning with phone snapshots.
How to Colorize Black & White Old Photos with AI: A Real-World Test of 3 Color Styles
With one 1979 black-and-white family photo, I tested three colorization approaches—natural restoration, vivid cinematic, and seasonal mood. Skin tone differs the most; clothing color fails the most. Includes prompt patterns and the right order of operations.
How to Generate Natural Portrait Lighting with AI: From Window Light to Rembrandt Lighting
The same face looks completely different under six lighting setups. I've put together a comparison table with prompt phrasing and ideal use cases for each type.
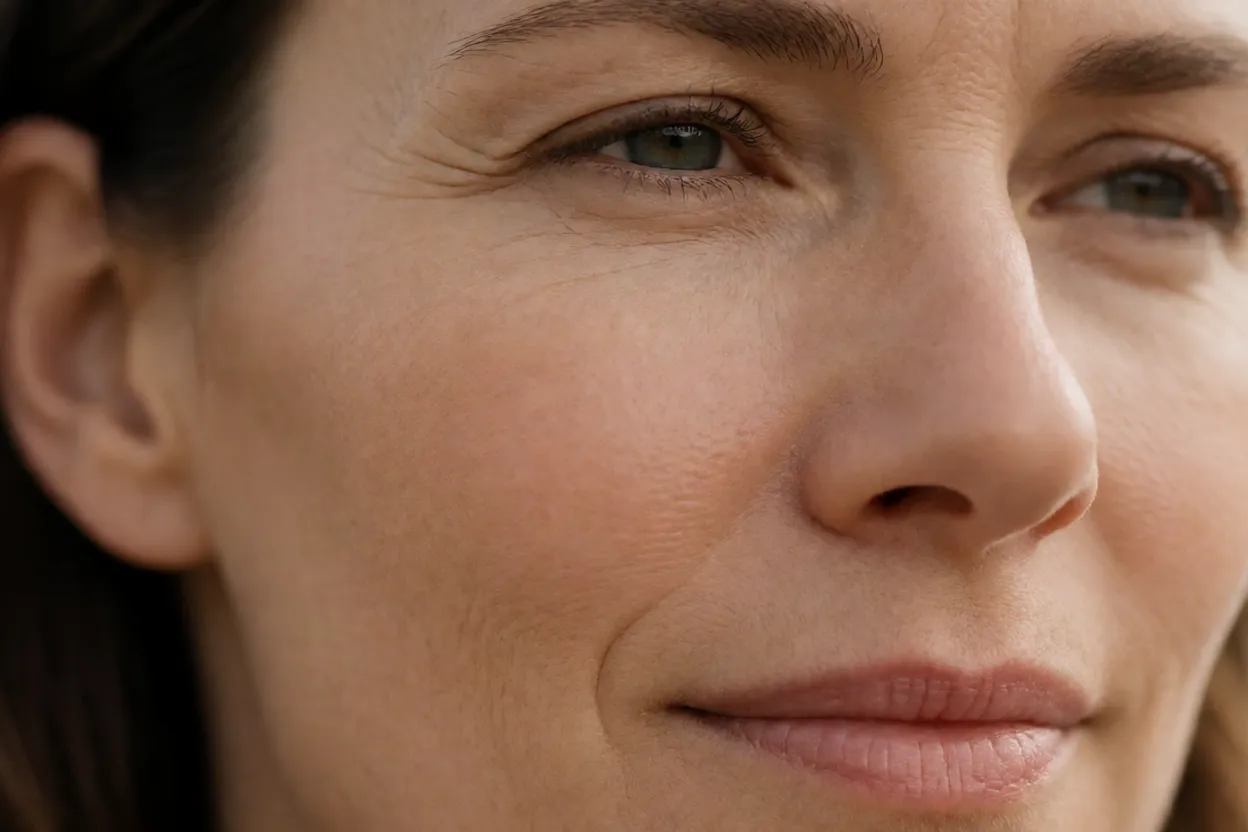
How to Avoid the Plastic Look: Adjusting Skin Texture in AI Portraits
Skin that’s too smooth and shiny like wax is a common flaw in AI portraits. I’ve tried five approaches and found three that truly work.